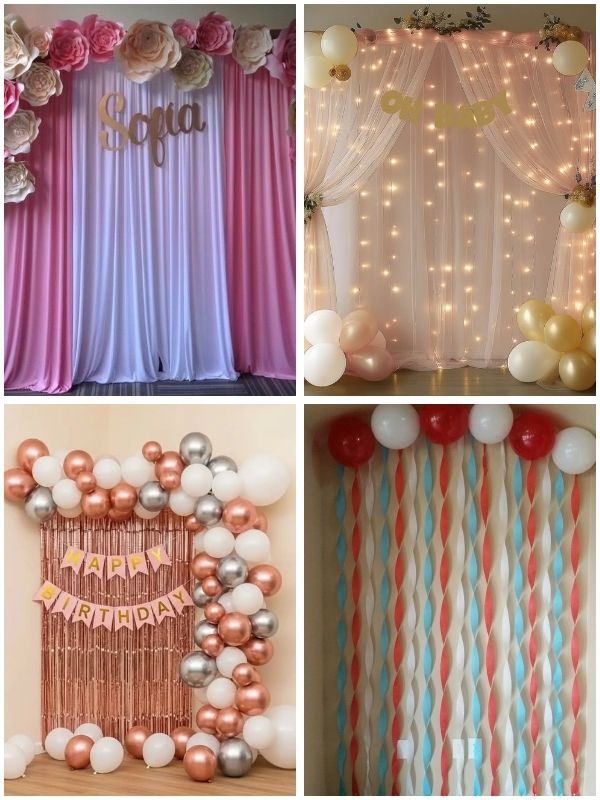
DIY birthday backdrop ideas for small spaces can help you create a beautiful photo area without spending too much money or taking up your entire room. Whether you are celebrating in a small apartment, bedroom, or living room, you can transform a simple corner into a festive birthday display with balloons, curtains, paper decorations, and other affordable materials.
The secret is to choose decorations that fit your available space, use your walls creatively, and keep the setup simple but attractive.
In this guide, you will discover 25 DIY birthday backdrop ideas for small spaces, along with practical tips to help you create a stunning birthday photo area that suits your theme, style, and budget.
See birthday party ideas at home for adults
25 DIY Birthday Backdrop Ideas for Small Spaces
You do not need a large event hall to create a beautiful birthday backdrop. With a little creativity, affordable materials, and the right placement, you can turn a small wall, bedroom corner, or living room into a lovely photo area. These DIY birthday backdrop ideas for small spaces include simple designs you can make at home, even if you have a limited budget or little decorating experience.
1. DIY Balloon Garland Birthday Backdrop
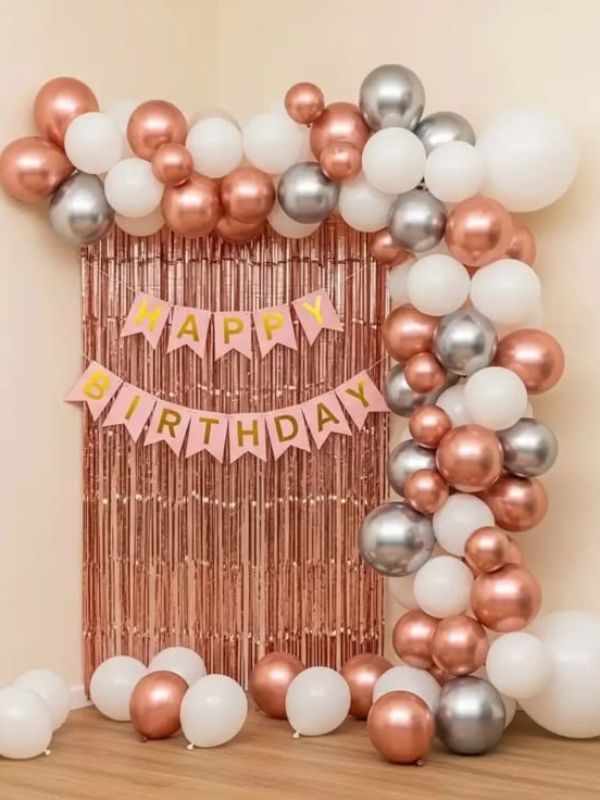
A balloon garland is a beautiful way to decorate a small birthday space without covering the entire wall. You can customize it with the birthday celebrant’s favorite colors and place it above a cake table or along one side of a wall.
Materials needed:
- Balloons in two or three colors
- Balloon decorating strip or balloon garland tape
- Balloon pump
- String or suitable removable hooks
- Scissors
How to create it:
- Choose two or three balloon colors that match your birthday theme.
- Inflate balloons in different sizes to give the garland a fuller appearance.
- Insert the balloon knots into the holes of a balloon decorating strip, alternating the colors and sizes.
- Attach the garland to the wall using suitable removable hooks or a secure support.
- Adjust the balloons to fill gaps and create a natural curved shape.
Small-space tip: Make a half-garland that curves around one corner of the backdrop instead of creating a full arch. This saves space and still gives you a beautiful photo background.
2. Simple Curtain Birthday Backdrop
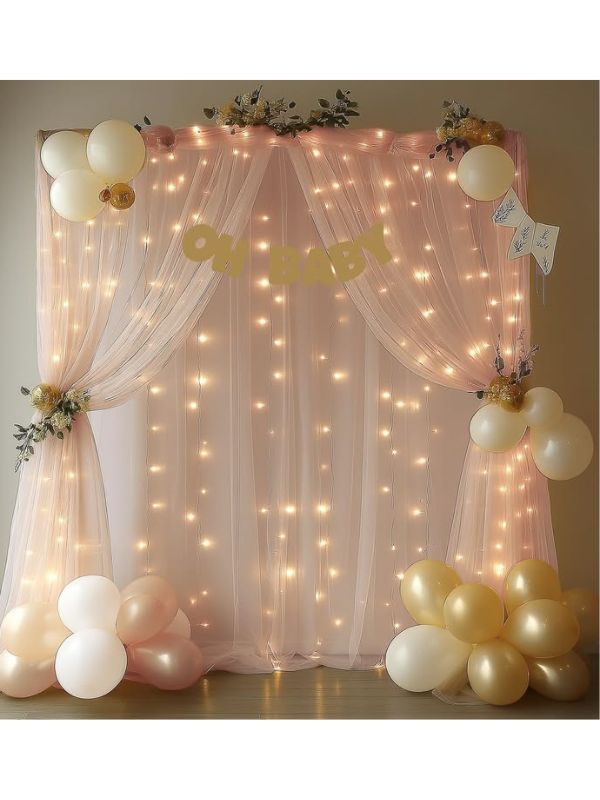
A curtain backdrop is an easy option if you want a clean, elegant birthday setup. It works well in bedrooms, apartments, and living rooms because the fabric can be removed and stored after the celebration.
Materials needed:
- A curtain, sheer fabric, or backdrop cloth
- Curtain rod, tension rod, or suitable support
- Clips or curtain rings
- String lights or a birthday banner (optional)
How to create it:
- Choose a fabric color that matches your birthday theme.
- Measure the wall or area you want to decorate.
- Hang the fabric from a curtain rod or secure support.
- Arrange the fabric into soft folds for a fuller appearance.
- Add a birthday banner, a few balloons, or fairy lights to complete the design.
Small-space tip: Use a single curtain panel that is wide enough for your photo area. You do not need to cover the entire wall if the decorated section will fit the people taking pictures.
3. DIY Fringe Curtain Backdrop
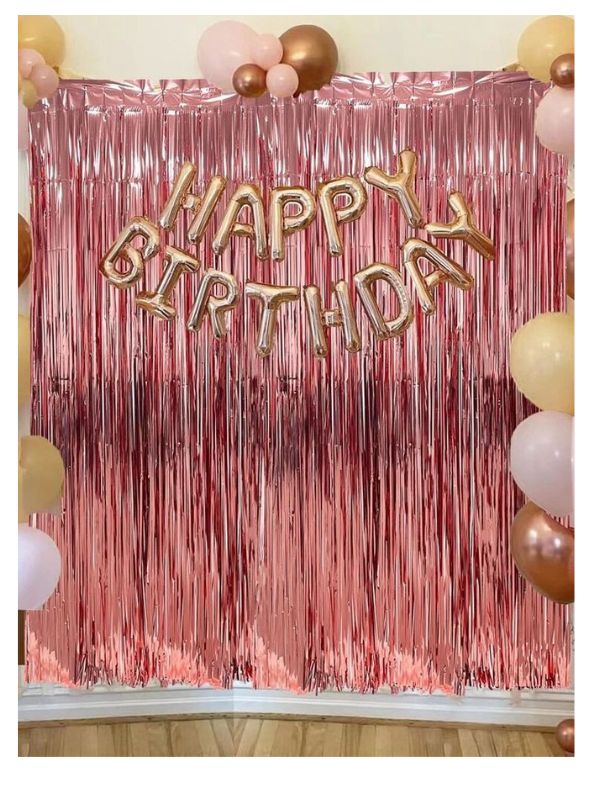
A fringe curtain backdrop adds shine, movement, and a party atmosphere to a small room. It is especially suitable for milestone birthdays, teenage celebrations, and glamorous adult birthday parties.
Materials needed:
- Metallic or colorful fringe curtains
- Removable hooks or suitable adhesive strips
- Birthday banner or foil balloons
- Scissors
How to create it:
- Select a fringe curtain in gold, silver, rose gold, or a color that matches your theme.
- Measure the area behind your cake table or photo spot.
- Attach the fringe curtain to the wall or another suitable support.
- Add a birthday age balloon or a personalized banner near the top.
- Smooth the fringe so it hangs evenly and trim any excess material if necessary.
Small-space tip: Cover only a narrow section of the wall. A compact fringe backdrop can create an attractive photo spot without requiring a large decorating area.
4. Paper Flower Birthday Backdrop
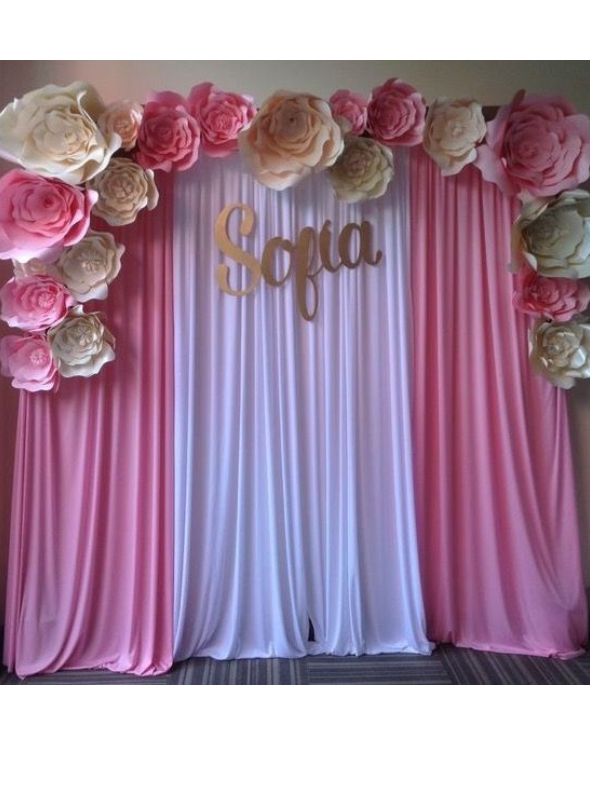
Paper flowers are an affordable way to create a colorful or elegant birthday backdrop. You can make them in different sizes and colors to suit a child’s birthday, a woman’s birthday, or a simple family celebration.
Materials needed:
- Colored craft paper or cardstock
- Scissors
- Pencil
- Glue or double-sided tape
- Cardboard for flower centers (optional)
How to create it:
- Choose paper colors that complement your birthday theme.
- Draw flower petals on the paper or use a simple paper flower template.
- Cut out the petals and layer them together to create each flower.
- Secure the layers with glue and add a small paper circle in the center.
- Attach the flowers to a lightweight backing or use suitable wall-safe adhesive.
- Arrange the flowers in one corner, around a birthday sign, or above the cake table.
Small-space tip: Make a few large flowers rather than dozens of tiny ones. A small, well-arranged flower display can look more attractive and keep the backdrop from becoming overcrowded.
5. DIY Streamer Birthday Backdrop
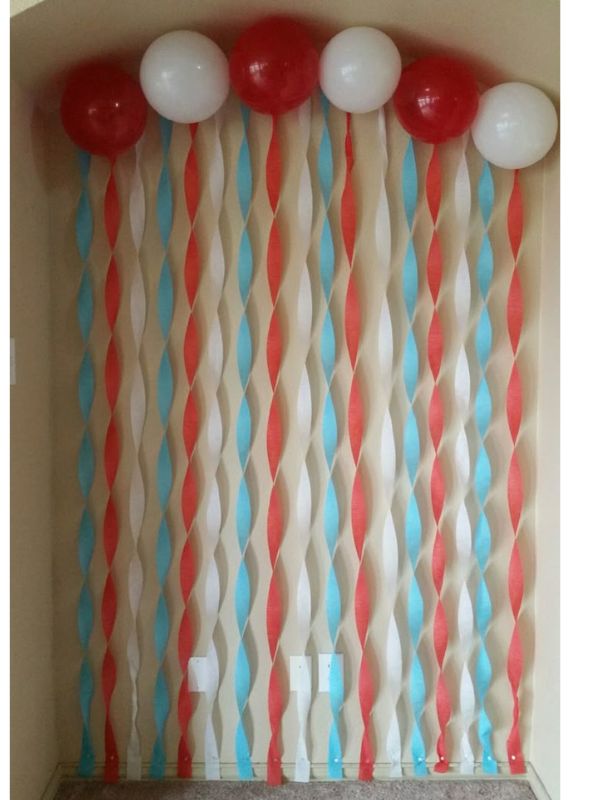
A streamer backdrop is one of the simplest birthday decorations to create on a budget. It adds color to a plain wall and is easy to customize for almost any age or party theme.
Materials needed:
- Crepe paper streamers
- String or ribbon
- Tape or suitable removable hooks
- Scissors
- Birthday banner (optional)
How to create it:
- Choose two or three colors that work well together.
- Cut the streamers into strips long enough to cover your chosen wall section.
- Attach the strips side by side to a length of string or directly to a suitable support.
- Hang them vertically, leaving a little space between colors if you prefer a striped effect.
- Add a birthday sign or a small balloon cluster to create a focal point.
Small-space tip: Hang the streamers behind a small table or in a narrow corner. Keep them away from candles, heaters, and other heat sources.
6. Minimalist Birthday Backdrop With Balloons
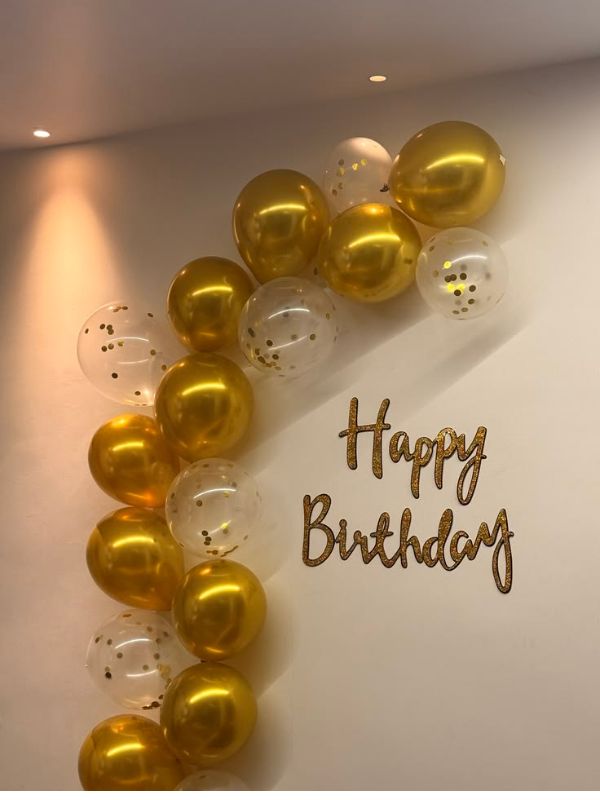
If you prefer a simple and modern birthday setup, a minimalist balloon backdrop may be the right choice. It uses just a few carefully placed decorations rather than covering the entire wall.
Materials needed:
- Balloons in one or two colors
- Balloon pump
- Birthday sign
- Removable hooks or suitable balloon attachment strips
- Small cake table (optional)
How to create it:
- Choose a plain wall with enough room for the celebrant to stand or sit.
- Inflate balloons in coordinating colors.
- Group the balloons into small clusters of three to five.
- Attach the clusters to one side of the wall or above the birthday sign.
- Place a small table with the cake or a few coordinated decorations underneath.
Small-space tip: Leave some of the wall visible. The open space makes the design look intentional and gives people room to pose for photographs.
7. DIY Birthday Backdrop With a Bedsheet
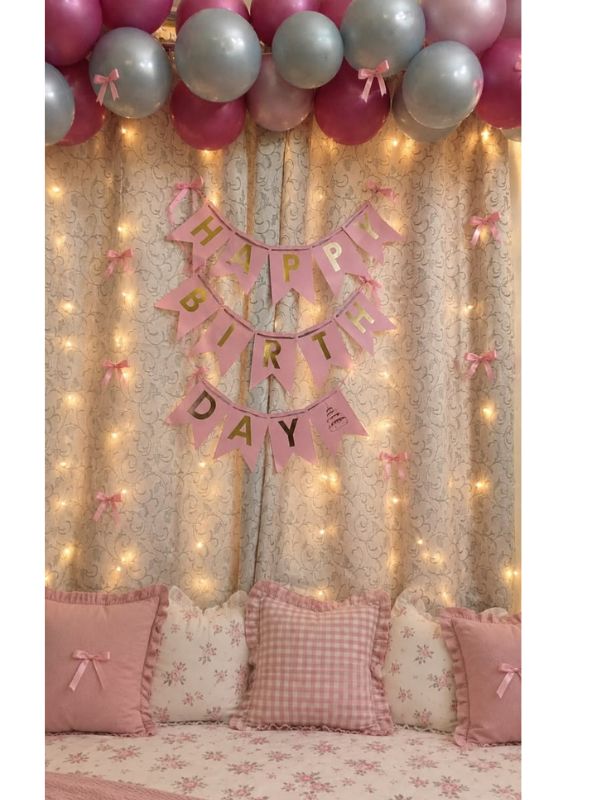
A clean bedsheet can become a simple birthday backdrop when you do not want to spend money on specialized event fabric. It works especially well for home celebrations.
Materials needed:
- A clean, plain bedsheet
- Clips or clothespins
- String, curtain rod, or suitable support
- Balloons, paper decorations, or a birthday banner
How to create it:
- Choose a bedsheet without noticeable stains or distracting patterns.
- Iron or smooth out the wrinkles so the background looks neat in photographs.
- Secure the sheet to a curtain rod, freestanding support, or suitable hooks.
- Pull the fabric evenly so it hangs straight.
- Add a birthday banner, balloons, or paper flowers to personalize the display.
Small-space tip: Use a single-color bedsheet and decorate only the top or one side. Avoid adding too many accessories that may make the simple background look cluttered.
8. Small Space Birthday Backdrop With Fairy Lights
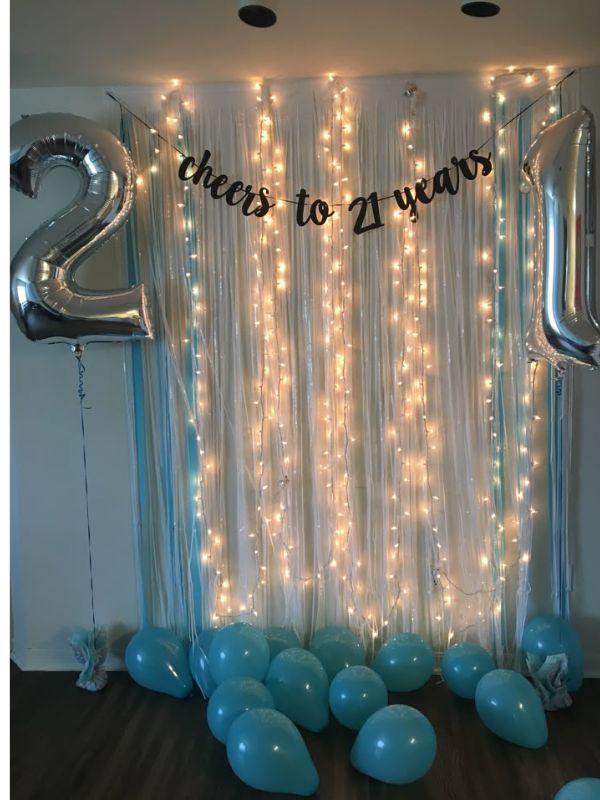
Fairy lights can transform a plain wall into a warm, inviting birthday photo area. This idea is especially attractive for evening celebrations and cozy indoor parties.
Materials needed:
- Battery-operated LED fairy lights
- Plain curtain or backdrop fabric
- Suitable hooks or clips
- Birthday banner or lightweight decorations
How to create it:
- Hang a plain curtain or fabric panel behind the area where people will take pictures.
- Arrange the fairy lights in vertical lines, a gentle zigzag, or a loose draped pattern.
- Secure the lights with clips or suitable hooks.
- Add a birthday sign or a small balloon arrangement.
- Turn on the lights and test the background using your phone camera.
Small-space tip: Warm-white lights work well with neutral fabric, while colorful lights can complement a playful birthday theme. Keep electrical cords tidy and lights away from flammable fabric or decorations that may become hot.
9. DIY Photo Collage Birthday Backdrop
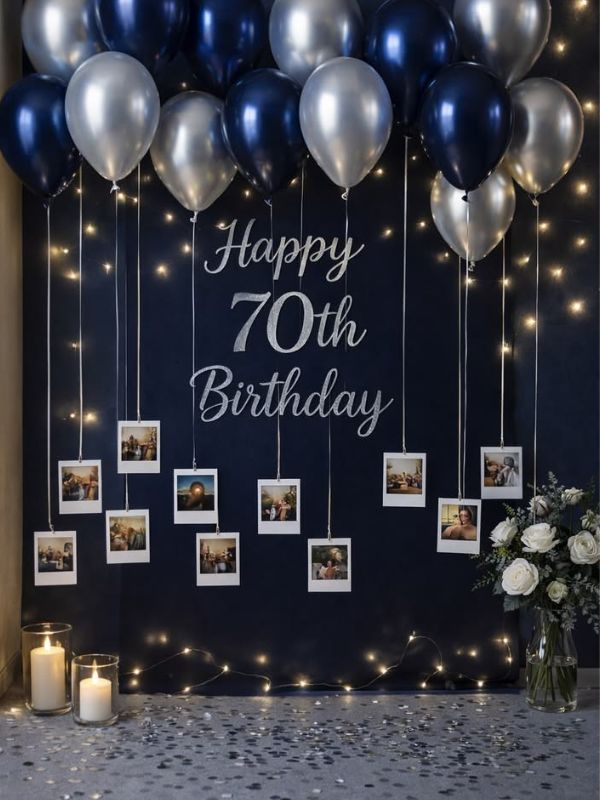
A photo collage makes the birthday backdrop personal and meaningful. It is a wonderful choice for milestone birthdays, surprise parties, and celebrations for partners, parents, or close friends.
Materials needed:
- Printed photographs
- Cardstock or lightweight backing paper
- Double-sided tape or removable wall-safe adhesive
- Scissors
- Birthday number or message (optional)
How to create it:
- Select photographs that represent memorable moments in the celebrant’s life.
- Print the photos in similar sizes for a neat appearance.
- Arrange them on the floor or a table before attaching them to the wall.
- Create a heart shape, number, grid, or simple rectangular arrangement.
- Attach the photographs carefully and add a birthday message at the top or center.
Small-space tip: Use a compact arrangement with approximately 12–20 photos, depending on their size and your wall space. Keep the collage at a height where everyone can see it and take pictures comfortably.
10. DIY Cardboard Birthday Backdrop
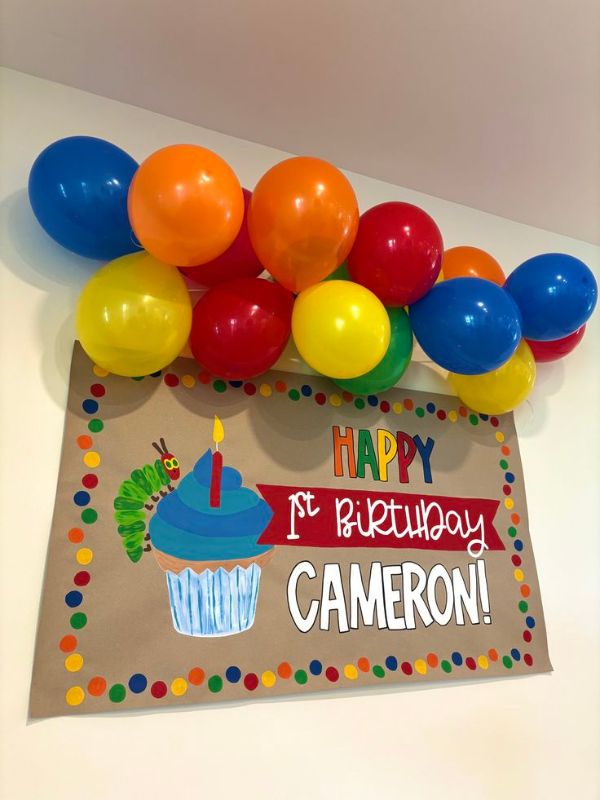
Cardboard is useful for making inexpensive decorative panels, birthday letters, and themed shapes. It is a practical choice when you want a custom design without buying expensive event props.
Materials needed:
- Clean cardboard boxes
- Pencil and ruler
- Scissors or craft knife
- Paint or wrapping paper
- Glue
- Lightweight decorative materials
How to create it:
- Flatten the cardboard and draw the shapes you want, such as arches, stars, large letters, or birthday numbers.
- Cut out the shapes carefully. An adult should handle craft knives and supervise children.
- Cover the cardboard with colored paper or paint it to match your theme.
- Allow painted pieces to dry completely.
- Attach the pieces to a suitable backing or secure them to a stable support.
- Add the birthday celebrant’s name or age to make the design personal.
Small-space tip: Create one large decorative panel instead of several bulky structures. Lightweight cardboard can give you the look of a custom backdrop while taking up little room.
11. DIY Birthday Backdrop With a Personalized Banner
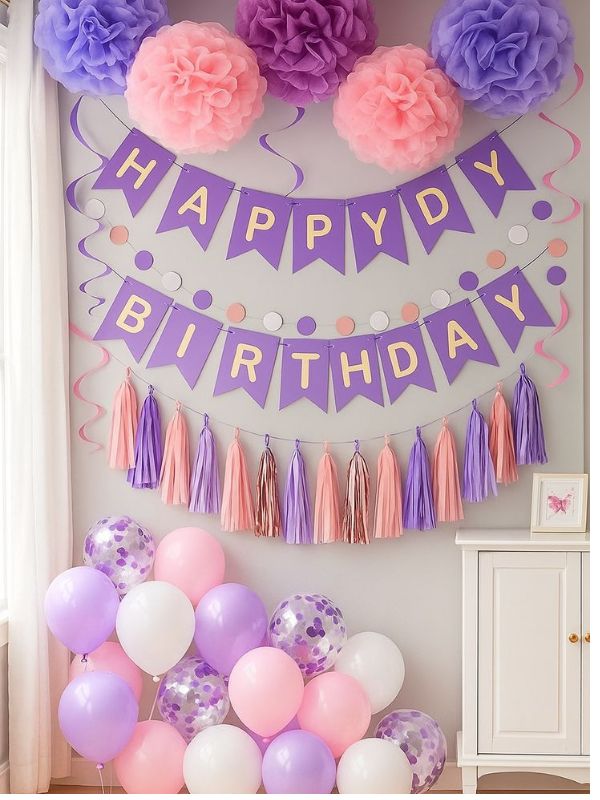
A personalized banner can become the main feature of a birthday backdrop without requiring many other decorations. It is suitable for children, teenagers, and adults.
Materials needed:
- Cardstock or colored paper
- String or ribbon
- Marker pens or printed letters
- Hole punch
- Scissors
- Balloons (optional)
How to create it:
- Decide on a short message, such as “Happy Birthday,” the celebrant’s name, or their birthday age.
- Cut the cardstock into matching triangles, rectangles, or other simple shapes.
- Write or attach one letter to each piece.
- Punch holes near the top and thread the pieces onto a string or ribbon.
- Hang the banner at the center of your backdrop.
- Add a few balloons or paper decorations around the edges.
Small-space tip: Keep the message short so the banner fits neatly above the cake table or within a narrow wall section.
12. DIY Paper Fan Birthday Backdrop
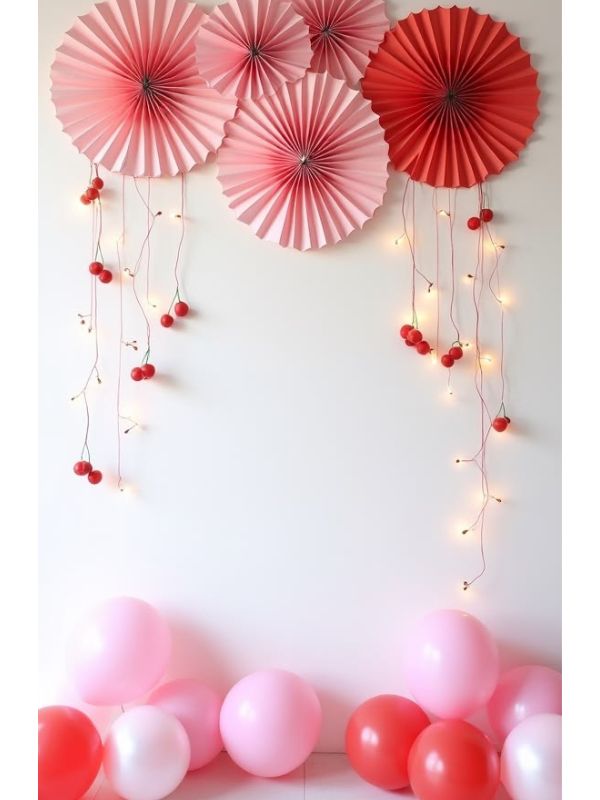
Paper fans create texture and dimension without taking up floor space. You can use them for a colorful children’s birthday or choose metallic and neutral shades for a more sophisticated celebration.
Materials needed:
- Colored paper or cardstock
- Scissors
- Glue or tape
- String or wall-safe adhesive
- Ribbon (optional)
How to create it:
- Cut sheets of paper to your preferred size.
- Fold each sheet back and forth in an accordion pattern.
- Fold the accordion in half and secure the center.
- Join the ends to form a circular fan.
- Make several fans in different sizes and colors.
- Attach them to a backing or wall in a balanced arrangement.
Small-space tip: Place three to seven fans around a birthday sign rather than covering the entire wall. Varying the fan sizes creates interest without making the design too busy.
13. Small Birthday Backdrop With a Cake Table
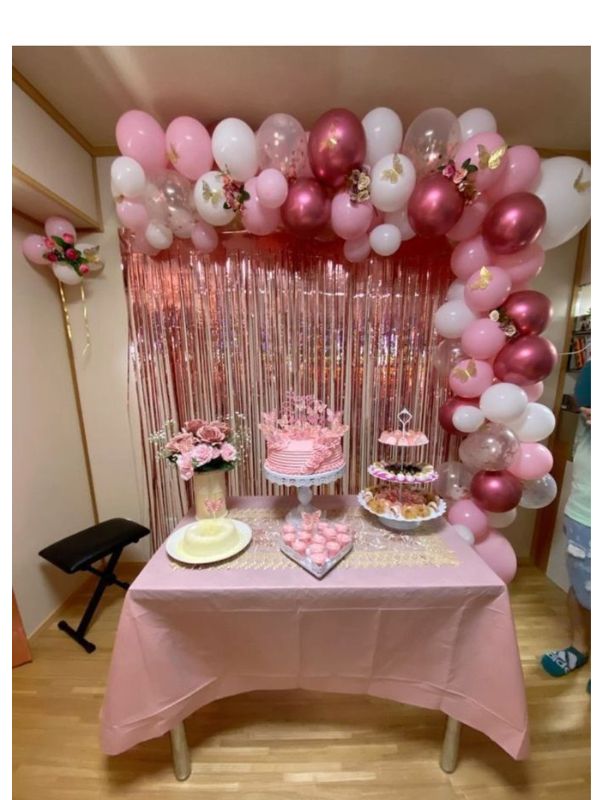
A cake table can serve as the center of your birthday decoration, especially when the room is too small for a separate photo booth. Decorating the wall behind the table creates a complete display in one compact area.
Materials needed:
- Small table
- Tablecloth
- Birthday cake or cake stand
- Balloons or a banner
- A few coordinated decorative accessories
How to create it:
- Choose a wall or corner with enough room for the table and people to stand nearby.
- Cover the table with a clean tablecloth that matches your theme.
- Place the cake at the center or slightly to one side.
- Hang a birthday banner on the wall above the table.
- Add a small balloon garland or a few paper decorations.
- Keep the remaining table space neat by using only a few accessories.
Small-space tip: Use a narrow table and avoid large floor decorations. Leave enough room in front of the table for the celebrant and guests to pose.
14. DIY Birthday Backdrop With Artificial Flowers
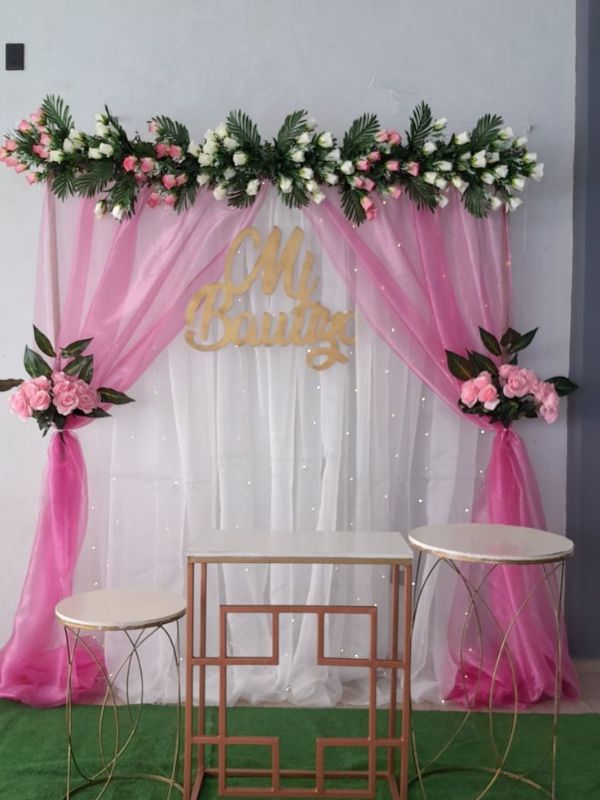
Artificial flowers can give a birthday backdrop a romantic or elegant appearance. They are reusable, and you can choose colors that suit the celebrant or party theme.
Materials needed:
- Artificial flowers
- Lightweight foam board or backing panel
- Floral wire or suitable adhesive
- Scissors or wire cutters
- Birthday sign (optional)
How to create it:
- Select flowers in two or three coordinating colors.
- Prepare a lightweight panel that fits the available wall space.
- Arrange the flowers on the panel before attaching them.
- Secure the flowers using suitable adhesive or floral wire.
- Add a birthday name sign or a small cluster of balloons.
- Position the panel behind the photo area and ensure it is firmly supported.
Small-space tip: Create a flower cluster in one corner or along one side of the panel instead of making a full flower wall. This reduces the number of materials needed while keeping the design attractive.
15. DIY Rustic Birthday Backdrop
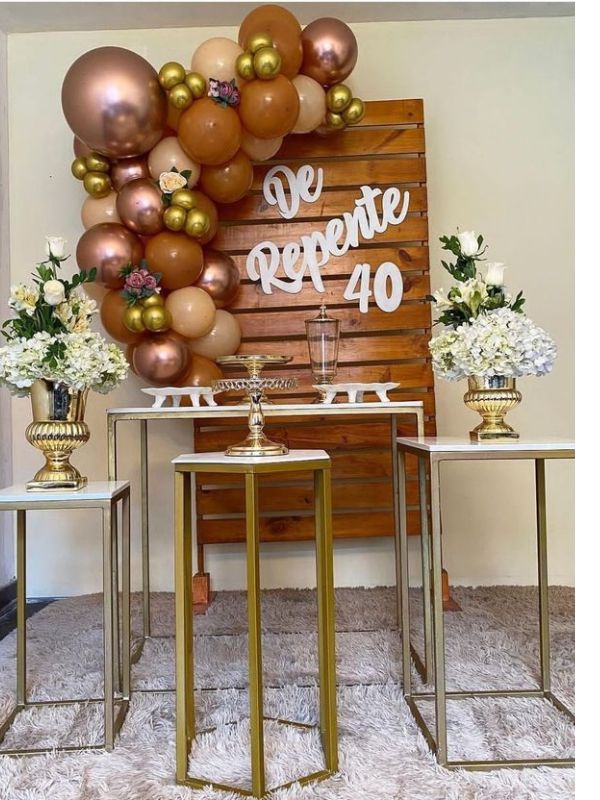
A rustic birthday backdrop uses natural-looking colors and simple materials to create a warm, relaxed atmosphere. It is suitable for adult birthdays, outdoor-inspired celebrations, and intimate home parties.
Materials needed:
- Beige, cream, or brown fabric
- Twine or jute string
- Artificial greenery
- Kraft paper or a simple birthday sign
- Small balloons or wooden-look decorations (optional)
How to create it:
- Hang a neutral fabric panel behind your chosen photo area.
- Make a birthday banner using kraft paper and twine.
- Add a small arrangement of artificial greenery around the banner.
- Include a few balloons in cream, brown, or muted green if desired.
- Place a small cake table beneath the backdrop to complete the setup.
Small-space tip: Use a simple neutral background and just a few natural-looking decorations. The restrained design makes the room feel calmer and more spacious.
16. DIY Birthday Backdrop With a Number Display
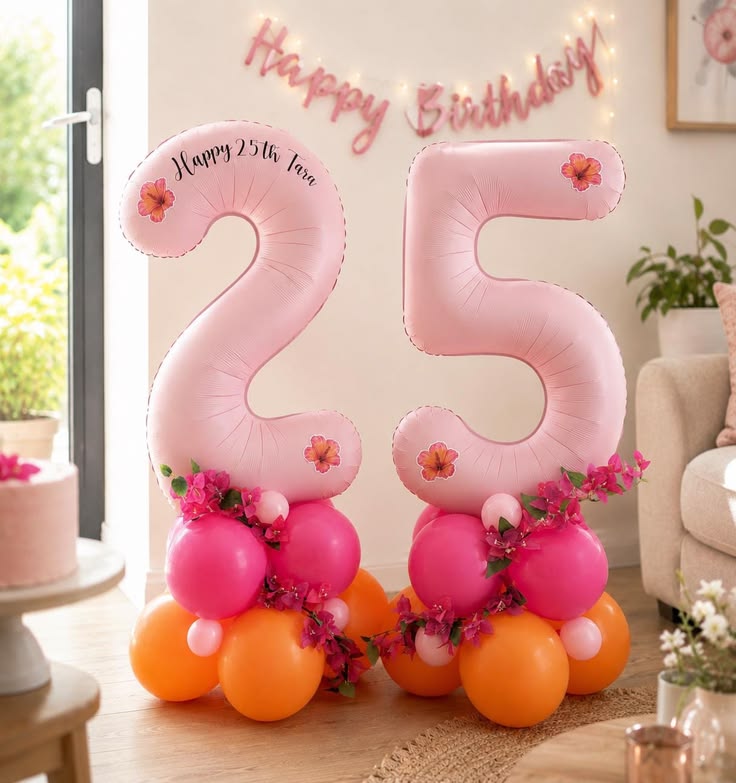
A large birthday number makes the celebrant’s age the focal point of the decoration. It works well for first birthdays, sweet sixteen celebrations, 30th birthdays, 50th birthdays, and other milestones.
Materials needed:
- Cardboard or a foil number balloon
- Paint or decorative paper (if using cardboard)
- Balloon pump (if needed)
- Suitable hooks or stable support
- Small balloon cluster (optional)
How to create it:
- Choose the number that represents the birthday age.
- Use a foil number balloon or cut the number from sturdy cardboard.
- Decorate the cardboard with paint, paper, or small lightweight embellishments.
- Secure the number to a stable support or suitable wall attachment.
- Add a small balloon cluster or birthday banner nearby.
- Check that the number is visible in photos without blocking the celebrant.
Small-space tip: A single large number can replace several smaller decorations. Choose a size that fits the wall and leaves enough room for people to pose beside it.
17. DIY Pastel Birthday Backdrop
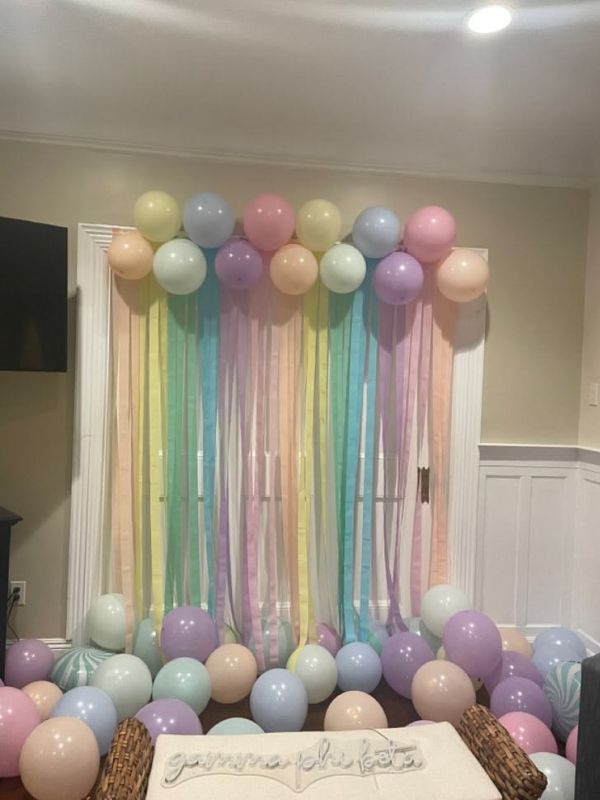
A pastel backdrop creates a soft, cheerful look that works well for children’s birthdays, baby-inspired celebrations, and elegant adult parties. Pale pink, lavender, mint, cream, and baby blue are popular choices.
Materials needed:
- Pastel balloons
- Light-colored fabric or curtain
- Birthday banner
- Balloon decorating strip or suitable hooks
- Paper flowers (optional)
How to create it:
- Select two or three pastel colors rather than using every shade.
- Hang the fabric or curtain as the background.
- Inflate balloons in different sizes and arrange them into a small garland.
- Attach the garland along one side or across the upper corner.
- Place the birthday banner in a clear central position.
- Add a few paper flowers if you want extra detail.
Small-space tip: Use a light-colored background and keep most of the decorations near the edges. This leaves an open area for photographs.
18. DIY Black and Gold Birthday Backdrop
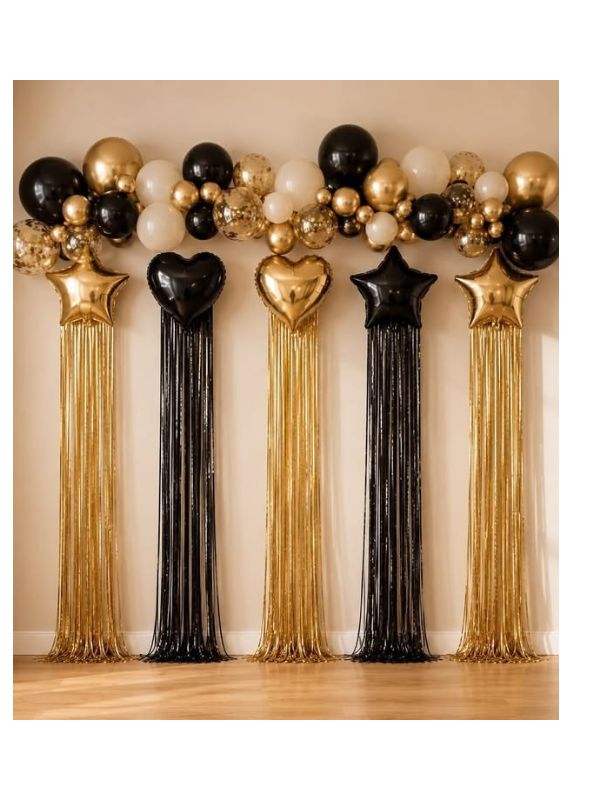
A black and gold backdrop is a stylish choice for adult birthdays, milestone celebrations, and glamorous home parties. The contrast between the colors creates a bold appearance without needing many decorations.
Materials needed:
- Black fabric or fringe curtain
- Gold balloons
- Gold birthday lettering or banner
- Removable hooks or suitable support
- Small table (optional)
How to create it:
- Hang a black fabric panel or fringe curtain behind the photo area.
- Inflate gold balloons in different sizes.
- Arrange the balloons into a small cluster on one side of the backdrop.
- Add gold birthday lettering or a personalized sign.
- Position a small cake table below the display if desired.
- Check that the gold decorations stand out clearly against the black background.
Small-space tip: Keep the gold accents concentrated in one area. Too many balloons and accessories can make the display look crowded.
19. DIY Kids’ Birthday Backdrop for Small Rooms
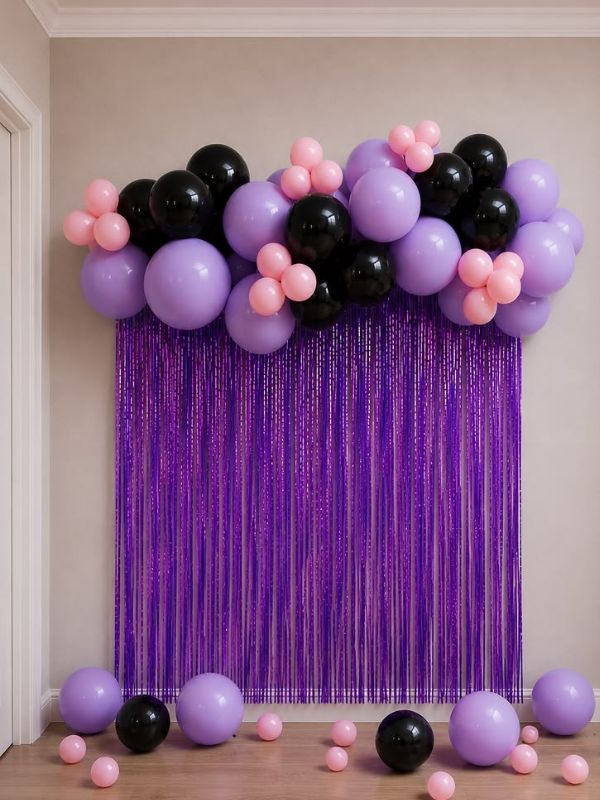
A children’s birthday backdrop can be colorful and playful without occupying the entire room. Choose a theme the child loves, such as animals, space, rainbows, or a favorite color combination.
Materials needed:
- Colored balloons
- Paper cutouts
- Birthday banner
- Colored fabric or paper backing
- Tape or suitable wall-safe adhesive
How to create it:
- Ask the child which theme or colors they would enjoy.
- Choose a small section of wall that is away from doors and busy walkways.
- Hang a colored fabric panel or create a simple paper background.
- Add themed paper cutouts and a birthday banner.
- Place a small balloon cluster along one side.
- Leave enough open space for the child and guests to take pictures.
Small-space tip: Decorate the wall rather than the floor so children have room to move around. Keep small parts, strings, and balloons away from very young children, and remove broken balloon pieces immediately.
20. DIY Adult Birthday Backdrop for Small Spaces
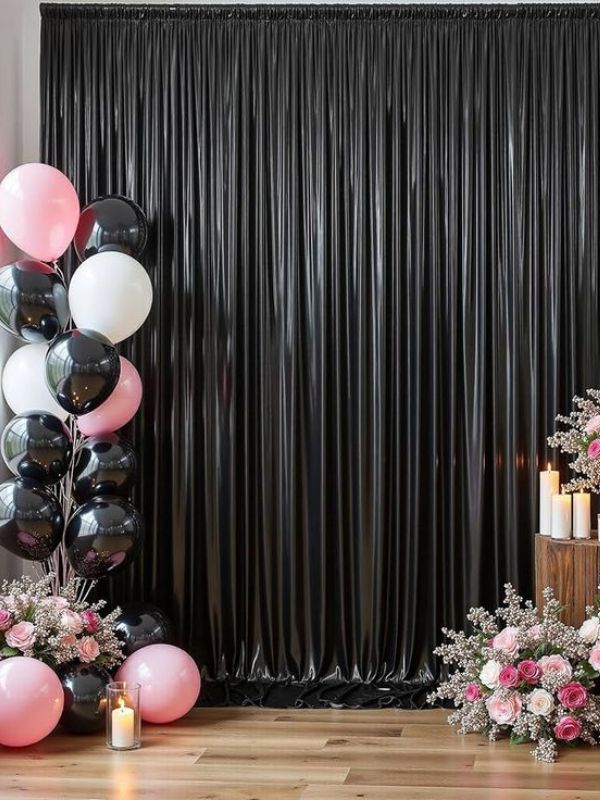
An adult birthday backdrop can look elegant with just a few coordinated decorations. You can use neutral colors, metallic accents, or the celebrant’s favorite shades to create a more personal display.
Materials needed:
- Plain fabric or curtain
- Balloons in coordinating colors
- Personalized birthday sign
- LED fairy lights (optional)
- Small cake table or pedestal
How to create it:
- Choose a color scheme that suits the celebrant’s style.
- Hang a plain fabric panel against a wall or suitable support.
- Add a personalized birthday sign near the center.
- Arrange a few balloons along one side or in the upper corners.
- Add subtle lighting if the celebration will take place in the evening.
- Keep the surrounding area tidy for photographs.
Small-space tip: Use one focal point, such as the name sign or a birthday number, instead of filling the backdrop with multiple competing decorations.
21. DIY Birthday Backdrop With a Tinsel Wall
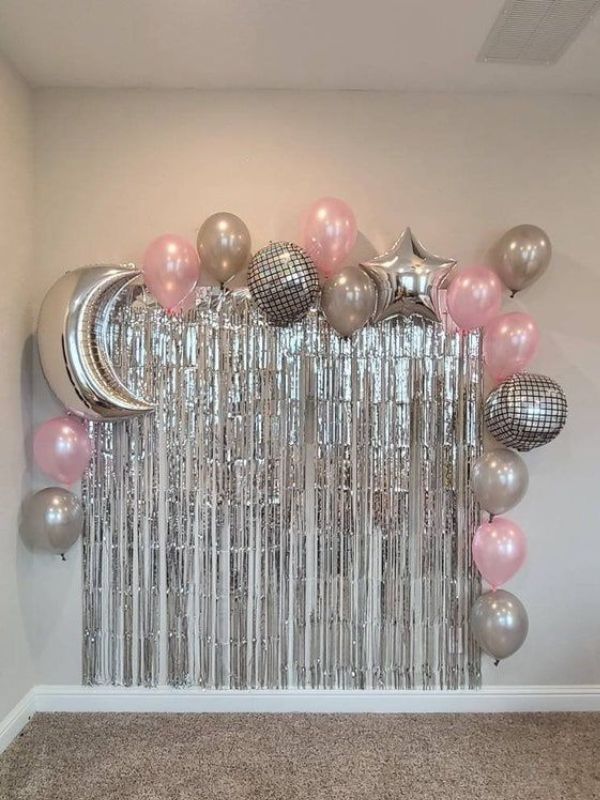
A tinsel backdrop adds sparkle to a small birthday celebration and looks especially good in photos. It is suitable for glamorous themes, teenage birthdays, and celebrations where you want a shiny background.
Materials needed:
- Tinsel curtain panels
- Suitable hooks or backing support
- Birthday sign or foil number balloon
- Balloons (optional)
How to create it:
- Measure the section of wall you want to cover.
- Choose tinsel curtains in silver, gold, rose gold, or your preferred color.
- Attach the panels side by side to cover the chosen area.
- Smooth the strands so they hang evenly.
- Add a birthday sign or a single number balloon.
- Take a test photo to check how the tinsel reflects the room’s lighting.
Small-space tip: A narrow tinsel panel behind the celebrant is often enough. This gives you a sparkly photo background without covering the whole room.
22. DIY Corner Birthday Backdrop
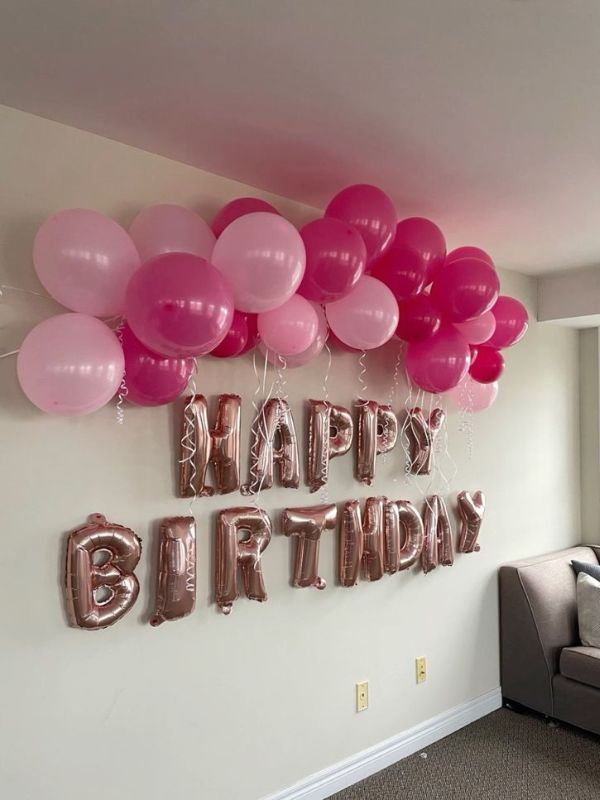
A corner backdrop is one of the most useful options when you have very little wall space. By decorating two adjoining walls, you can create a defined photo area without placing a large structure in the middle of the room.
Materials needed:
- Balloons or paper decorations
- Birthday banner
- Lightweight fabric (optional)
- Suitable hooks or wall-safe adhesive
- Small table (optional)
How to create it:
- Find an unused corner with enough space for people to stand or sit.
- Decide whether to decorate both walls or concentrate on one wall and the corner edge.
- Hang a birthday banner at a suitable height.
- Add balloons, paper fans, or flowers around the upper corner.
- Place a small table nearby if you want to display the cake or gifts.
- Check the camera angle to ensure the corner looks neat in photos.
Small-space tip: Keep the floor clear and avoid placing large chairs, gift boxes, or tables directly in the photo area.
23. DIY Birthday Backdrop With a Compact Balloon Arch
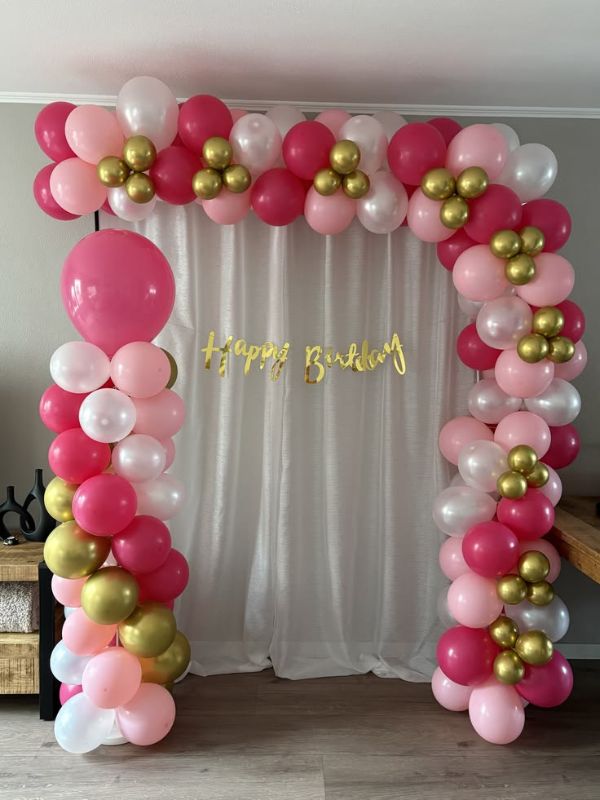
A balloon arch creates a festive entrance or photo area, but a full-sized arch may be too large for a small room. A compact half-arch gives you a similar effect with less space and fewer balloons.
Materials needed:
- Balloons in two or three colors
- Balloon pump
- Balloon decorating strip
- Lightweight arch support or secure wall attachment
- Scissors
How to create it:
- Measure the space where you want the arch to sit.
- Inflate balloons in a variety of sizes.
- Attach the balloons to a decorating strip, alternating colors and sizes.
- Shape the strip into a half-arch or curved arrangement.
- Secure the arch to a stable support or suitable wall attachment.
- Position it around one side of the birthday sign or cake table.
Small-space tip: Keep the arch narrow and close to the wall. Make sure it cannot tip over or obstruct the walkway.
24. DIY No-Stand Birthday Backdrop
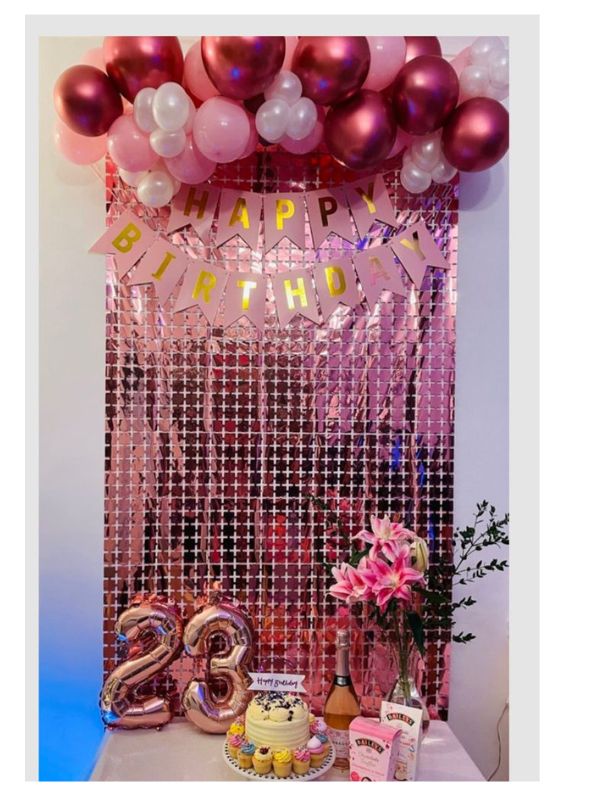
If you do not have a backdrop stand, you can still create a beautiful birthday photo area using a wall, lightweight fabric, paper decorations, or balloons. This option saves money and avoids storing bulky equipment after the party.
Materials needed:
- Lightweight fabric or a curtain
- Removable hooks or suitable wall-safe adhesive
- Birthday banner
- Balloons or paper decorations
- String or clips
How to create it:
- Choose a clean wall with enough space for your photo area.
- If using fabric, secure it to suitable hooks or an existing curtain rod.
- Hang your birthday banner near the center.
- Add balloons or paper decorations around the upper corners.
- Adjust the arrangement so the backdrop looks balanced.
- Check the attachments before the celebration begins to ensure everything is secure.
Small-space tip: Always check whether your wall surface is suitable for the adhesive you plan to use. Test it in an inconspicuous area first, and avoid hanging heavy decorations from weak hooks.
25. DIY Budget-Friendly Birthday Backdrop With Recycled Materials
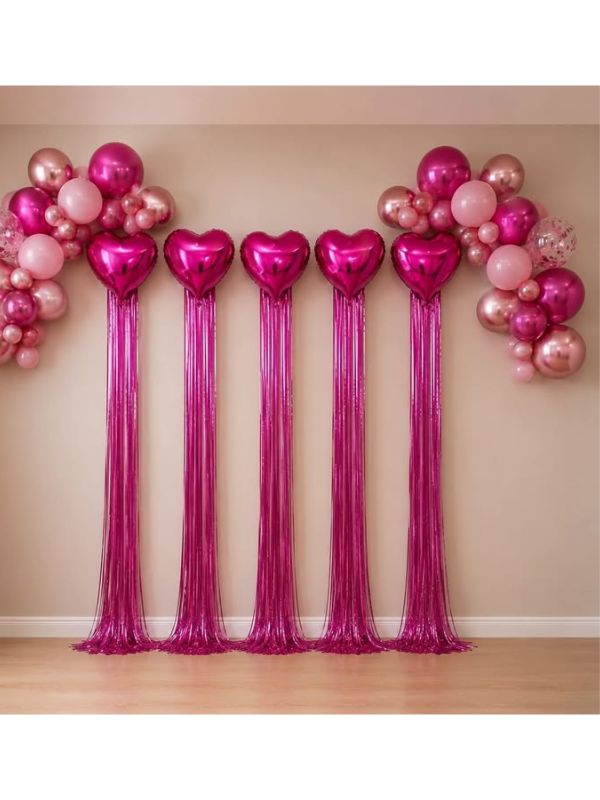
You can create an attractive birthday backdrop without buying a complete decoration kit. Reusing materials from previous parties or items you already have at home helps reduce costs and gives you room to personalize the design.
Materials needed:
- Clean cardboard boxes
- Leftover wrapping paper
- Fabric scraps
- Ribbon or string
- Reusable balloons or paper decorations
- Scissors and glue
How to create it:
- Gather reusable materials and sort them by color and condition.
- Choose a simple theme that works with the materials you already have.
- Use cardboard to make birthday letters, numbers, or decorative shapes.
- Cover the shapes with wrapping paper or paint them to match your theme.
- Use fabric scraps as a small background panel or table covering.
- Hang the decorations with suitable attachments and add a birthday banner.
- Step back and remove anything that makes the display look too busy.
Small-space tip: Reuse a curtain, bedsheet, or plain wall as the main background and reserve recycled materials for the decorative details. This keeps the design affordable, lightweight, and easy to remove after the party.
See 30 birthday party theme ideas for women
Final Tips for Creating a Beautiful Birthday Backdrop in a Small Space
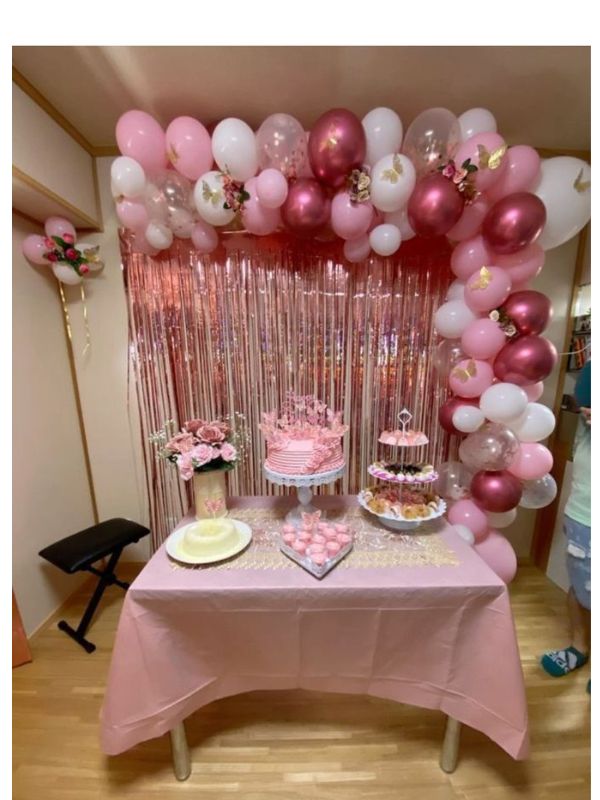
Before you begin decorating, measure the wall or corner you plan to use and decide where people will stand for photos. Choose a color scheme, gather your materials, and create one clear focal point, such as a birthday sign, balloon garland, or cake table.
Keep the decorations close to the wall, leave enough space for guests to pose, and avoid blocking doors or walkways. Use suitable wall-safe attachments and secure freestanding decorations properly. Most importantly, choose a design that fits your budget and the size of your room.
With a little planning, even a small corner can become a beautiful birthday photo area that makes your celebration feel special.
See birthday party theme ideas for men
How to Make a DIY Birthday Backdrop in a Small Space
Creating a DIY birthday backdrop in a small space is easier when you plan the design before buying decorations. You do not need a professional backdrop stand, expensive materials, or an entire wall to create a beautiful birthday photo area. With a few affordable supplies and a suitable corner, you can create a backdrop that looks attractive in pictures while leaving enough room for your guests to move around.
Follow these simple steps to create a birthday backdrop that suits your room, theme, and budget.
Step 1: Choose the Best Location
Start by finding a suitable spot for your birthday backdrop. A plain wall in the living room, a bedroom corner, or the space behind a small cake table can work well.
Look for an area with enough room for the birthday celebrant to stand or sit comfortably. Avoid locations that block doorways, windows, or frequently used walkways.
How to do it:
- Walk around your room and identify one or two possible locations.
- Check which wall looks cleanest and has the fewest distracting objects.
- Stand in front of the wall and check whether there is enough room for photographs.
- Look at the natural light available, especially if you plan to take pictures during the day.
- Move unnecessary furniture away from the photo area.
Practical tip: A corner can be especially useful when you have limited wall space. You can decorate the corner and use the adjoining wall to create a wider background without placing a large structure in the room.
Step 2: Pick a Birthday Theme and Color Scheme
Your theme and colors will guide the decorations you choose. A coordinated backdrop usually looks more attractive than one with too many unrelated colors and accessories.
For example, a child’s birthday might feature bright balloons and colorful paper decorations, while an adult birthday could use black and gold, cream and brown, or blush pink and white.
How to do it:
- Decide whether you want a playful, elegant, minimalist, or glamorous backdrop.
- Choose two or three main colors.
- Select a background material that complements those colors.
- Decide which decorations will match your theme, such as balloons, streamers, flowers, or a birthday banner.
- Keep the design consistent so the finished backdrop looks coordinated.
Practical tip: If your room already has colorful furniture or patterned walls, choose simple decorations in complementary shades. This prevents the backdrop from looking too busy.
Step 3: Measure the Available Space
Measuring your space before decorating helps you avoid buying materials that are too large or making a backdrop that leaves little room for photographs.
How to do it:
- Use a measuring tape to measure the width and height of the wall or corner.
- Decide how much of that area you want to cover.
- Mark the approximate boundaries of the backdrop using removable markers or another suitable method.
- Measure your cake table or any furniture that will sit in front of the display.
- Make sure the final arrangement leaves enough space for people to stand or sit comfortably.
Practical tip: You do not need to cover the entire wall. A backdrop that is wide enough for the celebrant and one or two guests can be sufficient for a small home celebration.
Step 4: Gather Affordable DIY Materials
Once you know the size and design of your backdrop, prepare the materials you need. Shopping with a clear list helps you avoid unnecessary purchases.
Materials you may need include:
- Balloons in your chosen colors
- A plain curtain, bedsheet, or backdrop fabric
- Birthday banner or personalized sign
- Paper flowers, streamers, or paper fans
- String, ribbon, and clips
- Scissors and tape
- Suitable removable hooks or wall-safe adhesive
- A small table, if you want to display the cake
You do not need to use every item on this list. Choose materials that suit your design.
How to do it:
- Check what you already have at home.
- Reuse decorations from previous celebrations when they are still in good condition.
- Make a shopping list of the items you genuinely need.
- Compare prices before purchasing balloons, fabric, and other supplies.
- Prepare handmade decorations before the day of the party.
Practical tip: A plain bedsheet, a handmade birthday banner, and a small balloon garland can be enough to create an attractive backdrop on a tight budget.
Step 5: Create a Focal Point
A focal point is the main feature that draws attention to your birthday backdrop. It could be the celebrant’s name, a birthday number, a banner, or a small balloon arrangement.
Without a clear focal point, the backdrop may look like a random collection of decorations.
How to do it:
- Choose one main feature for your backdrop.
- Position it where it will be visible in photographs.
- Add smaller decorations around it without covering the main feature.
- Keep enough open space for the celebrant to pose.
- Step back and check that the decorations look balanced.
For example, if you are creating a 30th birthday backdrop, you could hang a simple birthday banner in the center and place a small balloon garland along the upper-right corner.
Practical tip: Avoid using a large birthday sign, several number balloons, multiple banners, and many decorative props all at once. One strong focal point often looks better in a small room.
Step 6: Add Decorations Without Cluttering the Room
This step brings your design together. The aim is to make the backdrop festive while keeping the room comfortable and easy to move around in.
How to do it:
- Attach your background fabric or curtain first, if you are using one.
- Hang the birthday banner or personalized sign.
- Add balloons, paper flowers, or streamers around the edges.
- Keep the decorations close to the wall rather than spreading them across the floor.
- Remove any accessories that make the design feel overcrowded.
- Check that all decorations are securely attached.
Practical tip: Use vertical space. Hanging streamers, banners, and lightweight decorations draws the eye upward and helps preserve valuable floor space.
For safety, use wall attachments suitable for your surface and test them before adding decorations. Secure any freestanding structures so they cannot tip over, and keep decorations away from candles, heaters, and other heat sources.
Step 7: Test the Backdrop for Photos
Your backdrop may look beautiful in person but appear different through a phone camera. Testing it before guests arrive gives you time to fix any problems.
How to do it:
- Stand where the birthday celebrant will pose.
- Take a test photograph using your phone.
- Check whether the birthday sign and decorations are clearly visible.
- Look for distracting objects, wrinkles, harsh shadows, or unwanted reflections.
- Adjust the lighting and reposition decorations where necessary.
- Take another photo to confirm that the backdrop looks balanced.
Practical tip: Face the photo area toward a window for soft natural light during the day. If you are celebrating in the evening, use suitable room lighting or an LED light placed in front of the celebrant. Avoid placing a bright window directly behind the person, as this can make their face appear dark.
Final Checklist Before Your Birthday Party
Before your guests arrive, check the following:
- The backdrop fits the available space.
- The colors and decorations match your birthday theme.
- The birthday sign is easy to see.
- Balloons and other decorations are securely attached.
- There is enough room for people to pose.
- Doors and walkways are clear.
- The lighting is suitable for photographs.
- The cake table and surrounding area are neat.
Creating a DIY birthday backdrop in a small space does not have to be expensive or complicated. By choosing the right location, measuring before decorating, using affordable materials, and keeping your design simple, you can create a beautiful photo area that makes your celebration feel special without overcrowding your home.
Common Mistakes to Avoid When Making a DIY Birthday Backdrop
Creating a DIY birthday backdrop for small spaces is easier when you plan your decorations carefully. However, a few common mistakes can make your setup look crowded, messy, or less attractive in photos. Avoiding these problems will help you create a beautiful birthday backdrop that fits your space and budget.
1. Choosing a Backdrop That Is Too Large
One common mistake is choosing a backdrop that takes up too much wall or floor space. Large balloon arches, oversized panels, and bulky stands can make a small room feel cramped.
How to avoid it: Measure the area before buying decorations. Choose a compact balloon garland, a simple curtain backdrop, or a decorated corner that leaves enough room for people to stand and take pictures comfortably.
2. Using Too Many Colors and Decorations
Combining too many colors, balloons, flowers, banners, and other decorations can make your backdrop look cluttered. Instead of creating an attractive focal point, the decorations may compete for attention.
How to avoid it: Choose two or three main colors that complement your birthday theme. Select one main decoration, such as a balloon garland or personalized birthday banner, and use smaller decorations to complete the look.
3. Forgetting About Lighting
Even a beautiful birthday backdrop can look dull in photos if the area is too dark or has harsh shadows. Poor lighting can also make your birthday decorations appear less colorful.
How to avoid it: Position the backdrop near a window when possible so you can take advantage of natural light. If the room is dark, use suitable lamps or fairy lights to brighten the display. Take a few test photos before the celebration to check how the backdrop looks on camera.
4. Blocking Walkways and Furniture
Trying to fit too many decorations into a small room can block doorways, cover important furniture, or leave little space for guests to move around. Balloon stands and cake tables can also become obstacles when placed carelessly.
How to avoid it: Use wall space instead of spreading decorations across the floor. Keep the cake table compact, position decorations close to the wall, and leave enough room for guests to walk around and pose for pictures safely.
5. Buying Supplies Before Measuring
Purchasing balloons, curtains, backdrop stands, and decorative panels before checking your available space can lead to wasted money. Some items may turn out to be too large, while others may not fit your chosen design.
How to avoid it: Measure the width and height of your chosen wall or corner first. Decide on your design, make a list of the materials you need, and buy only what fits your plan. Check whether you already have useful items at home, such as bedsheets, ribbons, string lights, or cardboard.
6. Attaching Decorations Without Checking Wall Safety
Using unsuitable tape, nails, or strong adhesives can damage painted walls or cause decorations to fall during the celebration. Heavy decorations may also be unsafe if they are not properly supported.
How to avoid it: Use removable wall hooks or adhesive strips suitable for your wall surface, following the product instructions. Test them in a discreet area when appropriate, and use secure supports for heavier decorations. Keep electrical lights and cables arranged safely, away from walkways.
7. Making the Backdrop Too Busy for Photos
A backdrop may look attractive in person but appear distracting in photographs if the decorations are too close together or the birthday message is hidden behind balloons and flowers.
How to avoid it: Keep the main birthday message visible and leave some open space around it. Arrange the decorations around the edges rather than covering the entire background. Take a test photo from the distance guests will use to check that the design looks balanced.
By avoiding these common mistakes, you can create a DIY birthday backdrop that looks stylish without taking over your room. Remember, a small backdrop does not need many decorations to stand out. A clear theme, a few well-chosen details, good lighting, and careful placement can make your birthday photo area look beautiful.
Frequently Asked Questions About DIY Birthday Backdrops for Small Spaces
1. How can I make a birthday backdrop in a small room?
You can make a birthday backdrop in a small room by decorating one wall or an empty corner with balloons, curtains, paper flowers, fairy lights, or a birthday banner. Choose two or three colors, use vertical space, and keep decorations close to the wall. This creates an attractive photo area without taking up too much floor space.
2. What materials can I use for a cheap DIY birthday backdrop?
Affordable materials include balloons, bedsheets, crepe paper, streamers, cardboard, ribbons, paper flowers, fairy lights, and homemade birthday banners. You can also reuse decorations from previous celebrations to save money. Choose materials that match your theme and are easy to arrange in your available space.
3. How do I make a birthday backdrop without a stand?
You can create a birthday backdrop without a stand by hanging a curtain, bedsheet, banner, or lightweight decorations on a suitable wall. Removable adhesive hooks or wall-safe strips may work, depending on the surface and the weight of the decorations. You can also use a doorway or an existing curtain rod as a support, provided it is secure and suitable for the setup.
4. How much space do I need for a birthday backdrop?
You do not need a large room to create a birthday backdrop. A small section of wall or an empty corner may be enough for a simple photo area. The space you need depends on the design and the number of people taking pictures. Measure the area before decorating and leave enough room for people to pose comfortably without blocking walkways.
5. Can I make a balloon backdrop in a small apartment?
Yes, you can make a balloon backdrop in a small apartment by using a compact balloon garland, a half arch, or a small balloon cluster arranged around a birthday sign. Attach the balloons to a suitable wall-safe support or balloon strip rather than building a large structure that occupies the floor. Keep the design simple so the room remains comfortable and easy to move around.
6. How can I attach a birthday backdrop without damaging the wall?
Use removable adhesive hooks, wall-safe strips, or other hanging methods designed for your wall surface. Follow the manufacturer’s weight limits and removal instructions, and test an inconspicuous area when appropriate. For heavier decorations, use a freestanding support or another secure method instead of relying on adhesive alone.
7. What colors make a small birthday backdrop look elegant?
Simple color combinations often work well in small spaces. White and gold create a classic look, while blush pink and cream give a soft, elegant feel. Black and gold can create a bold, glamorous backdrop, and pastel colors are suitable for playful celebrations. Choose colors that complement your birthday theme and avoid using too many shades at once.
8. How can I make a DIY birthday backdrop look good in photos?
Choose a clean background, arrange decorations evenly, and keep the birthday message visible. Position the backdrop where there is good lighting, preferably near a window during the day. Remove clutter from the surrounding area and take a test photo before the celebration. Make sure there is enough space for everyone to stand comfortably in front of the backdrop.
9. What is the easiest DIY birthday backdrop for beginners?
A simple curtain backdrop with balloons and a birthday banner is one of the easiest options for beginners. Hang the curtain or fabric securely, add a small balloon cluster to one side, and place the banner in a visible position. This design requires few materials, is easy to customize, and works well in bedrooms, living rooms, and small apartments.
10. How can I decorate a birthday backdrop on a tight budget?
Start by using items you already have at home, such as plain fabric, string lights, ribbons, or cardboard. Make your own birthday banner, use a small number of balloons, and focus your decorations on one wall or corner. Instead of buying a complete backdrop kit, purchase only the materials needed to bring your chosen design to life.
Conclusion
Creating a beautiful birthday photo area does not require a large room or an expensive decoration budget. With these DIY birthday backdrop ideas for small spaces, you can transform a simple wall or empty corner into a stylish display that makes your celebration feel special.
The key is to choose a design that fits your space, use affordable materials, and keep your decorations simple but attractive. Whether you prefer a balloon garland, a curtain backdrop, paper flowers, or a personalized birthday banner, small details can make a big difference.
Before you begin, measure your available space, select a color scheme, and plan where your decorations will go. Remember to leave enough room for guests to move around and take beautiful pictures.
Ready to create your own birthday backdrop? Choose your favorite idea from this list, gather your materials, and start decorating. You can create a memorable birthday photo area without overcrowding your home or spending more than you need to.
2 thoughts on “25 DIY Birthday Backdrop Ideas for Small Spaces”